Menu management
Restaurant menu modifiers: a practical POS setup checklist
A modifier should answer a question the kitchen needs resolved. Start with one real dish, decide which choices matter, and test the entire order before applying the pattern across your menu.
Start with one dish and the conversation around it
Take a sandwich your team sells throughout the day. Write the questions a server asks: which bread, which side, and whether the guest wants an extra. Then write what the cook needs to see. That gives you a small menu specification before anyone starts adding buttons.
Keep the main item name recognizable. Put a repeatable choice, such as a side, into a modifier group. Reserve the item note for a request that does not fit an existing choice. If staff repeatedly type the same instruction, review whether it deserves a named option at the next menu update.
- Item: the dish the guest believes they ordered.
- Choice: a decision needed to prepare that dish.
- Addition: an optional extra with its price shown when applicable.
- Note: an exceptional instruction that the team must read and confirm.
Separate required choices from optional additions
A sandwich that must have one side needs a different rule from a sandwich that can have several extras. Define the minimum and maximum choices for each group. For a single side, both are one. For optional additions, the minimum is zero; the maximum should reflect what your team is prepared to offer.
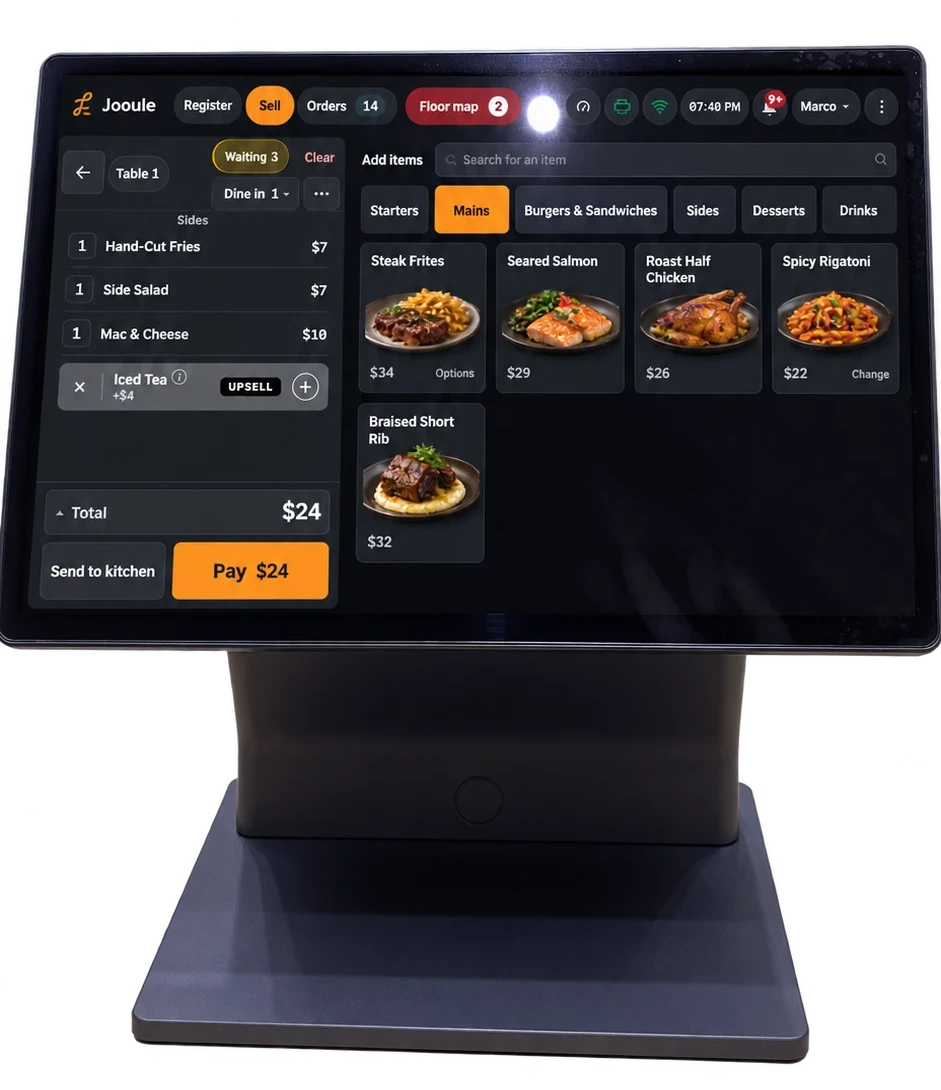
Jooule menu groups support selection limits and default choices. Test the behavior you configured rather than relying on the word “required.” A preselected default may already satisfy the rule. If the guest must actively choose, make that expectation part of the ordering conversation and verify the starting state of the screen.
Make defaults and shared groups deliberate
A default describes the usual order. It should agree with the dish description and with what the kitchen prepares when no change is requested. Ask a team member to open the item and read back the selection without tapping anything. An unexpected side or extra is easier to catch here than during a rush.
Reuse a choice group when the choices, limits, and meaning really are the same. Before changing a shared group, inspect the other dishes that use it. A new side that works for a lunch sandwich may not belong with a breakfast plate. Keep a short list of those relationships so the next person editing the menu understands the effect.
Check the ticket as carefully as the ordering screen
The guest, server, and cook see the same order from different positions. A name that looks clear on a large register can become hard to follow among several lines on a ticket. Use distinct option names, and ask the person preparing the dish to explain the finished ticket back to you.
Check quantities, additions, removals, and the preparation station. Then inspect the check to confirm that the item and any priced choices match the order. This is a content and configuration check: a successful tap alone does not show that the kitchen received the right instructions.
Run a small order test before service
Arrange a demonstration environment with whoever manages your setup, so practice orders do not enter live kitchen work or sales records. Run these cases on the register and on each guest ordering channel you actually use. Ask one person to order and another to check the receiving screen or ticket.
Record the expected result beside each case. If the optional extra is missing, or a sold-out item remains selectable, resolve that specific case and repeat it. Keep the list: it becomes the next menu release check, not a one-time exercise.
- Order the standard dish with its initial choices unchanged.
- Change the required side and confirm that the new choice reaches the ticket.
- Add an optional extra and check the displayed total.
- Try to continue with an incomplete or excessive selection and inspect the response.
- Order two versions of the same dish and confirm that their different choices remain clear.
- Mark a dish unavailable in the demonstration menu and check the other ordering screens.
Give each menu update an owner
Choose who edits the menu, who checks the kitchen result, and when the change takes effect. Tell the shift team what changed in guest language: “The sandwich now offers these two sides” is more useful than “We updated the modifiers.” Have the opener confirm the change on the device they will use.
Review external menu listings separately. Google Business Profile can hold menu items and a menu link, so the information a guest finds there deserves its own check after a menu change. An update in Jooule does not by itself establish that a separate Google listing has changed.